Form Handling in React
The react form data handles many things like Radio buttons, Inputs, and List, sends data to the backend, and fetched it. forms take so many functionalities using the form so we will see how to handle that form in react.
React forms are a little bit different than HTML Forms. Here's an easy way to handle these input fields. Describes common input types such as checkboxes, text, selective input, radio, range, and text area.
Controlled form and Uncontrolled form
In React, when a component renders a form that contains elements such as text input, selections, and checkboxes, there are two ways to maintain and update its state.
So, The first approach is Uncontrolled where the form is not up to date, and after the state changes value is not rendered in it.
The second approach is Controlled and where the form is up to date and its values are also updated after the rendering will happen.
First, we will see the Input Field.
Text Inputs
for the text input, we need to use value and onChange() event to handle the input filed
check the following example:
import React, { useState } from "react";
import validator from "validator";

const App = () => {
  const [emailError, setEmailError] = useState("");
  const validateEmail = (e) => {
    var email = e.target.value;

    if (validator.isEmail(email)) {
      setEmailError("Email Validatioon Succesfull");
    } else {
      setEmailError("Enter valid Email!");
    }
  };

  return (
    <div style={{ margin: "auto",marginLeft: "300px"}}>
      <pre>
        <h2>Check Email Validation</h2>
        <span>Enter Email: </span>
        <input type="text"  id="userEmail" onChange={(e) => validateEmail(e)}></input>{" "}
        <br />
        <span style={{ fontWeight: "bold",  color: "red"}}>
          {emailError}
        </span>
      </pre>
    </div>
  );
};
export default App;
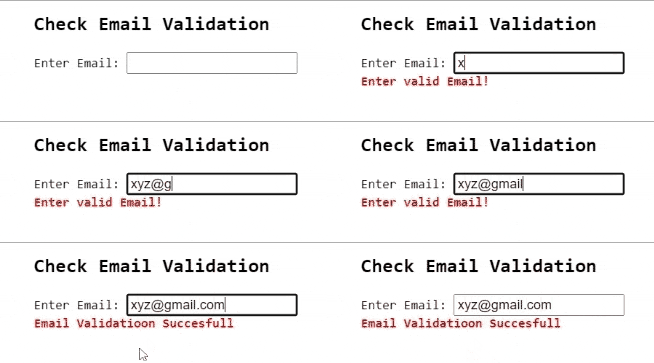
Final Output to check Email validation:

App.js: Write the following code in the App.js file. Here, the App is the default component that you write code to validate your email with a simple UI.
useState Hook
In this code, we used the useState hook to add a state and assigned the state variable an empty default string. This is similar to declaring a state object in a class-based component.
The second item returned by the useState hook is a function you can use to update the state value.
If you returned anything in the input field It checks with the function which we added in the onChange() function. The value will be fetching from e.target.value .
The second import validator used for Email verification is the process of verifying that an email address is deliverable and valid. Whether it's an honest mistake or a deliberate wrong direction, we carry out a rapid process of catching typos. It also checks if an email address exists in a trusted domain such as Gmail or Yahoo.
that's it for Input filed now we see some other form handling.
Radio Button
Radio buttons are handled differently in React. The most common way to handle a group of radio buttons is to use both values and valid attributes together.
Here we see how you can handle and manage the state of radio buttons in React.
import * as React from "react";

const App = () => {
  const [favoriteFruit, setFavoriteFruit] = React.useState("Apple");

  const handleMangoChange = () => {
    setFavoriteFruit("Mango");
  };

  const handleAppleChange = () => {
    setFavoriteFruit("Apple");
  };

  return (
    <div>
        <RadioButton label="Apple" value={favoriteFruit === "Apple"}
              onChange={handleAppleChange}
        />
        <RadioButton label="Mango" value={favoriteFruit === "Mango"}
              onChange={handleMangoChange}
        />
    </div>
  );
};
const RadioButton = ({ label, value, onChange }) => {
  return (
    <label>
      <input type="radio" checked={value} onChange={onChange} />
        {label}
    </label>
  );
};
export default App;
To change the state of the Radio button we are using the onChange() event handler to handle the functions.
To check/uncheck a radio button in React, we use the checked property of the input elements, which is the set value when the radio button is checked.
As you can see in the code above, you don't have to do this in React. This is because the condition value === […] for each checked attribute implements the grouping logic needed if two radio buttons cannot be checked at the same time.
- handleMangoChange() function set the mango value to the RadioButton value after check to the mango radio button.
- handleAppleChange() function set the mango value to the RadioButton value after check to the mango radio button.
Output of following code:

###Selects
The main purpose of the select tag form is to collect user data. For example, you may want to ask a user to select a gender.
import { useState } from "react";

const App = () => {
  const optionSelect = [
    { value: "", text: "--Choose an option--" },
    { value: "apple", text: "Apple 🍏" },
    { value: "banana", text: "Banana 🍌" },
    { value: "kiwi", text: "Kiwi 🥝" }
  ];

  const [selectedFruit, setSelectedFruit] = useState(optionSelect[0].value);

  const handleChange = (event) => {
    console.log(event.target.value);
    setSelectedFruit(event.target.value);
  };

  return (
    <div>
      <select value={selectedFruit} onChange={handleChange}>
        {optionSelect.map((option) => (
          <option key={option.value} value={option.value}>
            {option.text}
          </option>
        ))}
      </select>
    </div>
  );
};
export default App;
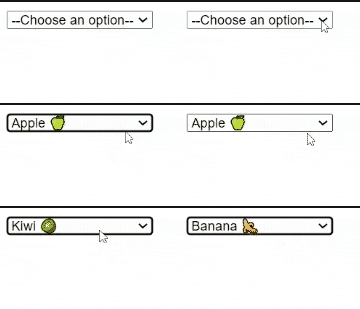
This is a very basic component that encapsulates the main functionality of the element. The user can select one of the options and the selected value status property stores the selected value.
In the following example will see that the optionSelect list contains multiple fruit Items added in value and we are fetching that list using the map() function.
The user can choose from multiple options, and changing the select option runs the handleChange() function by using the onChange() event attribute to update the status of the component.
The status will be updated using useState hooks where the value is fetched using event. target. value and stored it using the setSelectedFruit function.
Output of following code:

TextArea
TextArea component is extended user Input, React handles text areas and common text input in a very similar way.
A normally used form control is a textarea, which is used to receive multi-line input from the user. It is different from normal text input, which allows you to enter only one line. A good example of a textarea use case is an address field.
import React from "react";
import { Textarea } from "evergreen-ui";

export default function App() {
  const [address, setAddress] = React.useState("");

  return (
    <div style={{
        display: "block",
        width: 800,
        paddingLeft: 10
      }}
    >
      <h4>Textarea Component</h4>
      <Textarea onChange={(e) => setAddress(e.target.value)}
            placeholder="Enter your Address"
      />{" "}
      <br></br>
      Address: {address}
    </div>
  );
}
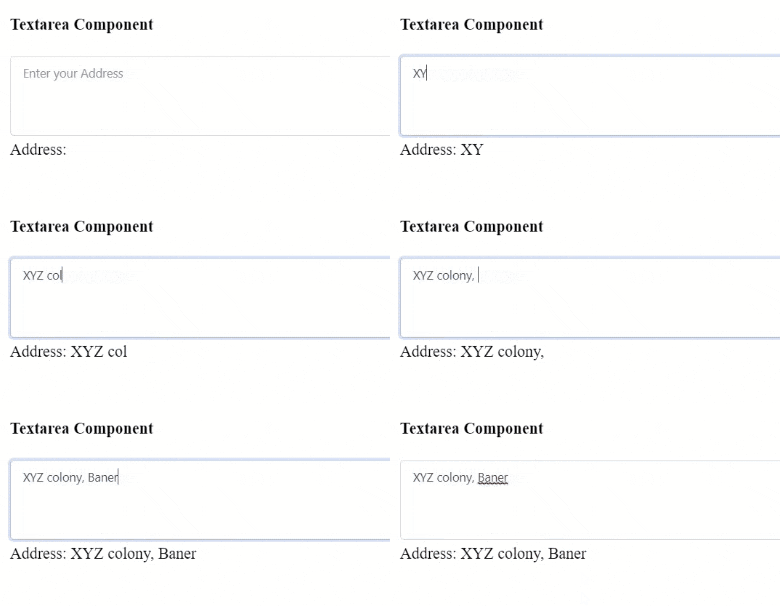
here we see that the textArea value is set to the setAddress function of useState hook and then the value is stored into it and set to the address.
Output of following code:

Thanks for Reading